
We were asked to support the Year 2 students with their Children’s Theatre production of Arabian Nights. Stage wise they required support with a number of set-pieces these were
- Roof of a tent – this was to be pyramid shaped wooden frame which could by hung from the truss and then fabric draped on it to symbolise being inside a tent.
- Archway – this was to make an entrance into the performance space from the back of the box via the green room.
- Magic box – this was a set piece which needed to house 2 people and also have spaces for props – this was the piece that I would be working on.
Diagrams and notes
Archway notes

Tent notes

Magic box notes
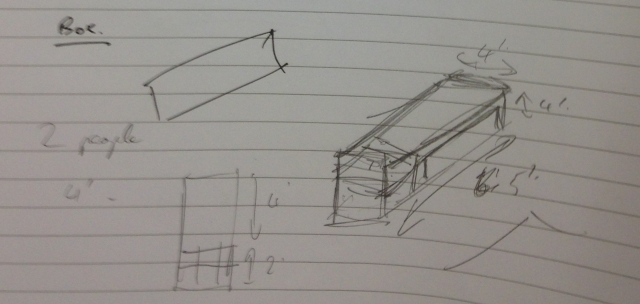
As mentioned earlier on the box at this stage required space for 2 people and also ideally had various compartments for props. This suggested that the box needed to be quite large so we thought it need to be between 5-6′ long, and 4′ high and wide. Of the length 2′ of this would be used for prop storage and we were at this stage going to have a top and bottom tier to this. The top tier would be accessed from the top of the box and the other tier would be a drawer or cupboard. Another requirement of the box was that there needed to be a ‘secret’ entrance to it.

I’ve ‘enhanced’ my pencil sketch to allow it to be more visible.
At this stage the box needed to be movable, was going to be in and out of stage and visible from all sides and have a hinged lid.

From these initial drawings and further conversations we cam up with a more specific plan of the box.
There were also some other design considerations that needed o be discussed.
How to move the box
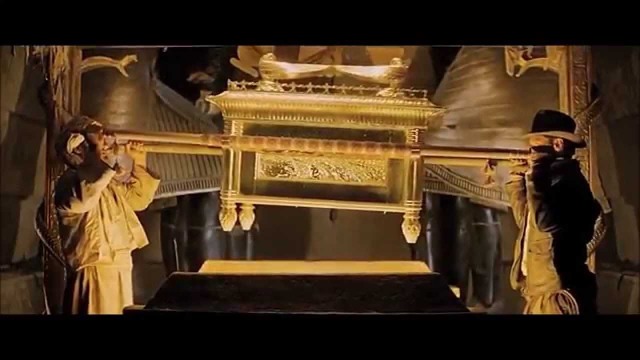
- Loops & Bars – as in raiders of the lost ark
- Handles
- Castors
Also a whether or not to have a flat or curved lid.
This was then used to show the director what our plans for the box was to see if it would fit within their vision. Whilst waiting on the reply to this we did some further research on Persian boxes and detailing.
Also at this stage I decided to create an image for this page, this was later used within the production as the projected main title.
Once our preliminary designs had been looked there were some changes and decisions made. The chest was going to have a flat lid as it was going to be used as a stage extension so performers would be required to stand on it. We also reduced its length to 5′ also there was no need for so many compartments, just one the height of the box and around 1′ wide to allow different props. Also at this stage it was required o be able to move around the performance area so needed a secret entrance that would not be visible.
This obviously impacted on design considerations. The top thus need to be a lot stronger than we originally thought if it was to be used as performance space. Also as the box needed o be moved possibly with performers inside the bottom would also need to be suitably reinforced. We stated at this point that the bow would be getting very heavy by this point due to its size and the reinforcements required to carry people.
Materials
frame – 2″x 1″ wood
Doweling
lid and base – 18mm ply wood
Side panels – 3mm hardboard
trim – 25mm x 38mm batten
Large hinges
After consultation we thought it best to try and use dowel joints to make the frame. We cut the frame pieces, basically 2 rectangles (top and bottom) and the uprights. We then trimmed some dowelling to size, and attempted to make a rudimentary jig to ensure correct dowel placement. This was made by cutting a couple of inches off the end of a length of 2×1 and drilling 2 holes through it of the right size for the dowels. Some scrap thin plywood was then attached to the sides to allow a hopefully square fit.
As can be seen in the images above we experienced some difficulty in ensuring perpendicular holes for the dowels, however we were given no further guidance on how to correct this. One of the main reasons for this was that we were doing by hand, correct instruction on how to get the holes correct would have been highly beneficial and would have allowed the subsequent build to hg smoother. Also whilst in the process of creating the base and the top it was realised that our cuts for lengths were no quite straight. Again we had to hand cut these so human error was a possible issue, frustratingly once we had cut these a chop saw became available which again would have made this step of cutting a lot more straight forward and also limiting human error.
The final problem we encountered was over sanding, when the cuts were sanded they were sanded too much and made into a bevel, these then had to sanded flat to ensure a good join, but this then had the knock on effect of altering the overall length of the wood. Luckily we decided to dry fit everything to begin with, which highlighted squaring issues, firstly though every piece was ready for 2 dowels the dowels were not lining up so we made the decision to cut out one of each pair. This enabled the box to be constructed. I think it is worth noting at this point that some of the wood appeared to have a twist in it. I know from experience that some wood when purchased appears to twist and bend. Again direction in correct wood preparation would have been highly valued at this point. I think that maybe the use of a planer would have enabled us start with wood which was straight to begin with.
As we were building the frame it became apparent that it would not fit out of our construction room so before attaching the uprights we moved to the new building at Kendal College. Where we put all the bits together to make the carcass.
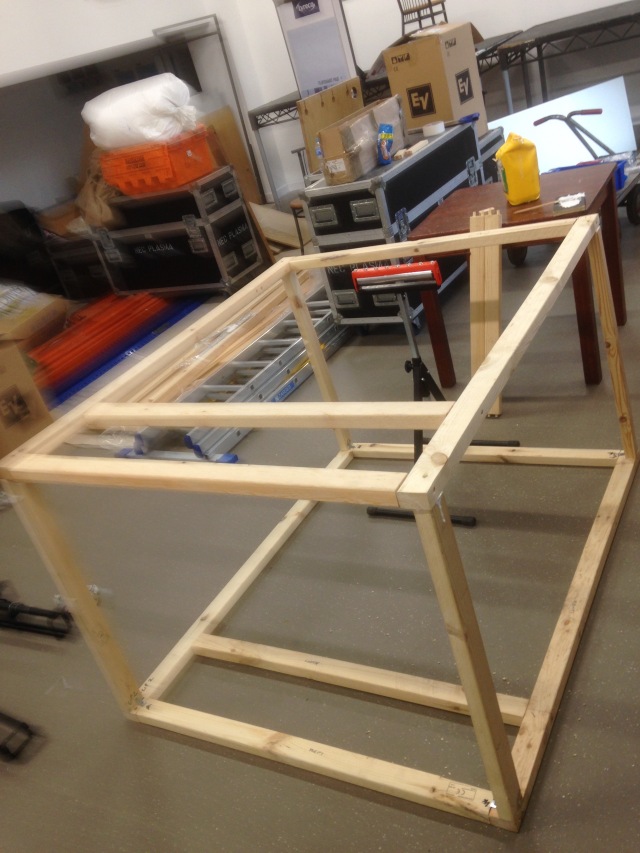
As we were putting this together we realised that the frame itself might not be able to support the weight of actors on the top. As such in subsequent photographs you will see cross pieces and more uprights. It was during this stage that we were told that the box would now not be seen on all sides by the audience so the rear of it could be re -thought. The easiest way for an actor to get in and out would be via an opening in the back which was covered with blackout material. Again in subsequent photos you will see this gap. The front of the box has 2 pieces going diagonally from the front top piece and the the rear of the box has uprights. Once this design change had been implemented and the supports added we started to panel the box with lengths of hardwood cut to size. This was done via machine so these need very little in terms of tweaking to ensure a nice fit. It should also be noted that the corners of the panelling did not need to match exactly as we were going to trim the edges. We also fitted the floor in the larger area at this point again some extra support was need for this.
Again though it was measured to save we did use some off cuts to try and keep some of the costs down, again worth noting were not given a budget for this construction and it sometimes feels like even though it is for a ‘professional’ production we are having to make do with what is available. With this in mind on one of the sides we had a join of the hardboard so we had to attach a secondary piece of wood to the main frame to allow this to be attached.


Once the frame was built we then measured and built the lid, this was attached using large hinges, again we encountered an error here, we wanted the hinges to in the strongest positions possible so this meant that they needed to be attached to the actual framework of the box, this was a problem as we needed to drill out space for the bolts to go so that the lid laid flat. Before lid attachment we attached the castors to the bottom.


Once the lid was attached we could add our trim, again this was measured to fit and attached to the main frame, one attached we went round with wood filler to cover any gaps and screw holes in anticipation of painting. By this point the other groups had began painting their props so we had a colour pallette to work from, basically creams, reds, blacks, golds so very simple but effective. We decided to cover the top of the lid cream, the sides on red and the trim gold.
For the panels we first painted them their base colour red and allowed to dry, we then mixed that base colour with some blue to make a darker shade and applied this in the recesses basically where the trim met the panels, Then we used a paper towel to rub this darker area and thus weather the box.
The trim was first painted black then lightly sprayed with gold again giving a weathering look, we used some scrap hardwood as a cover to stop us painting on the red panels.
We also had a design which was laser cut to go on the front of the box. This was used by other teams as a painting stencil, we were going to use the stencil itself as part of our design.
Once painted we attached the material to the back and made and painted to support poles for the lid, added the front decorations and made some handles for the side from some 2″x1″ scraps. It was at this stage that we were told the box wold now be stationary, thus making the base structure and support surplus to requirements. So once moved to the performance space we removed the castors.
Rehearsals and other props
Though the build went quite smoothly we did have some stumbling blocks, partly due to lack of knowledge on correct woodworking methods, the main frustration I felt was that the brief continued to change throughout the build, really changes were made until the final day. Knowing that the box wasn’t going to be moved would have saved us on materials, build time and overall weight of the box. All these issues were brought up during the build.
Projection
I was also involved in helping out with projections for the final show some of which I created and other we composited from various internet sources. I aslo suggested the use of Resolume to produce the projections for the show as I felt this software id more suitable to a theatre cueing environment.
